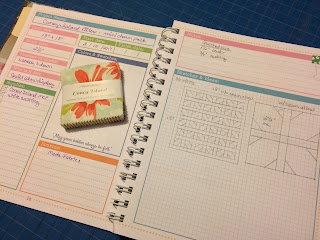
I recently got on board with a project planner, and I'm so glad I did. Choosing a planner wasn't easy. There's so many good ones. I ultimately chose the "Scrappy Project Planner" by Lori Holt of Bee in my Bonnet. Not only can you plan and design your own projects, Lori also included patterns. There's a great section on Tips & Organizing, too!
So the other night I grabbed my new planner and a Coney Island Mini Charm Pack and sketched out a simple design I'm calling "Hugs All Around". With a little help from my calculator, I did the math. Some times the calculations are trial an error, but you can always add to the border if the "calculator" didn't work. (wink wink)
I like to lay out my mini charms and take a photo once I find what looks good to me. There's no right or wrong to this step. It all depends on what looks good to you. Having the photo saves a lot of time if the mini charms get mixed up while stitching. I like to chain stitch when I can and most times the layout gets messed up. Just refer back to your photo and save lots of time!
Once the top was pieced came the decision all quilters struggle with.... How do I quilt it?
I, personally, love straight line quilting and crosshatching for pillows, but this pillow will be used in my quilt show display among other pillows with those types of quilting.
I wanted to do something different this time to make the pillow, and display, stand out. I tried circular quilting once before and it was a disastrous fail. I didn't think I would ever try it again, but I felt my quilting skills have steadily improved enough to give it another try.
I've been asked several times how I did the circular quilting. I started by making a small circle in the center. I actually used the bottom cap from a spool of Aurifil thread. Did you know the bottom cap comes off? I didn't know that for the longest time. That's where the end of the thread is to start the spool. (ugh) I traced around the cap for my starting circle. For the next circle, and all the circles after, I followed the previous stitches as a guide for my pressure foot.
You have to go slow and ease your project into the curve. Don't lift your pressure foot and turn the pillow. It will give you jagged points. Have patience and go slow. This pillow took more than 4 HOURS to quilt, so I quilted it over 2 days.
Once the quilting was done, I squared it and made a simple envelope back. I didn't have any Coney Island yardage yet for the binding, but rather than wait, I chose a complimentary print from Strawberry Fields Revisited I had in stock. It had most of the colors in Coney Island and matched beautifully.
Hope you like my new pillow pattern "Hugs All Around"
I would love to know if you are interested in a free tutorial for this pillow pattern.
Please leave a comment and let me know. Thanks!!
Fabric Shown: Coney Island
Designer: Fig Tree and Co.
Manufacturer: Moda Fabrics
20" Pillow Insert: IKEA $6
©2017 Tillalili, LLC - all rights reserved
Contents and photos on this blog are the property of Tillalili, LLC.
No portion of this blog can be used without written permission of the blog owner.


Gwen I love this pillow. Making a profit low is on my short list. Your blog changes are looking good.
ReplyDeleteThank you!! So glad you like the pillow, and the blog changes. We're getting there!
DeletePretty pillow, Gwen! I never quite know what to do with mini charm packs, so I'd love your pattern.
ReplyDeleteThank you Becca! So glad you like it!!
DeleteLove how cheerful and bright this design is with the light background--would like to buy the pattern as soon as it is ready!
ReplyDeleteThank you Terri! It makes me so happy to hear you would buy my pattern. I will probably do a free tutorial for this pillow. Be sure to follow my blog so you see when I post it. Happy Quilting!
DeleteThat's a very cute cushion and a great way to use those little squares. I love spiral quilting and have just quilted my first quilt this way. I think it gives lots of bang for your buck.
ReplyDeleteThank you Lisa! I'm so glad you like it! I bet your quilt looks great with the spiral quilting. It takes a lot of time, but so worth it!
DeleteYour pillow is beautiful! I would definitely love a free tutorial for this pillow pattern. Thank you!
ReplyDeleteThank you!! So glad to hear you like my pillow! I'll be working on tutorial soon. Be sure to follow my blog so you don't miss it. Happy Quilting!
DeleteWhat a cute pillow, and it looks so quick and easy! Wendy at piecefulthoughts@gmail.com
ReplyDeleteThank you! You're right...it is quick and easy. I'll be posting a tutorial later in the year.
DeleteThe pillow is wonderful.. Yes, yes, yes to a tutorial.
ReplyDeleteSo glad you like it! I will definitely do a tutorial!
DeleteHappy Quilting!